
7 Cheap DIY Grill Station Ideas: Budget-Friendly Outdoor Cooking Setups
You want a functional, attractive grill station without overspending, and I’ll show practical approaches that make it possible. I’ll help you build cost-effective, customizable outdoor cooking setups using common materials and simple techniques so you can upgrade your grilling area on a budget.
Expect ideas that suit different spaces and skills—from mobile carts and repurposed cabinets to masonry and concrete options—plus a concise look at tools, materials, and safety to keep projects manageable and durable.
1) Pallet Wood Rolling Grill Island with Painted Plywood Countertop
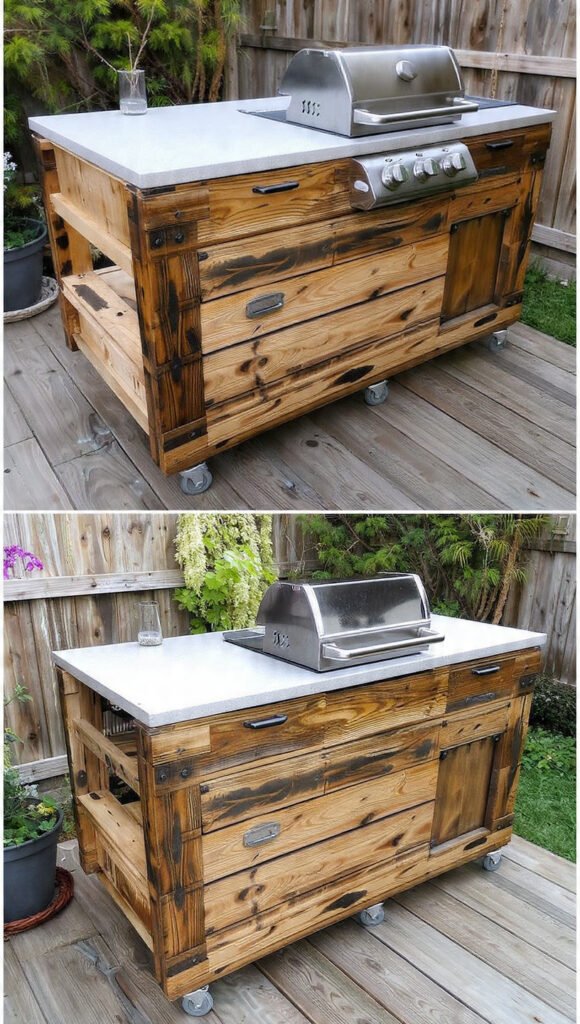
I converted salvaged pallet wood into a mobile grill island to keep costs down while retaining durability. I dismantled heat-treated pallets for clean boards, reinforced the frame with scrap 2x4s, and attached heavy-duty casters so the island moves easily across my patio.
I chose a painted plywood countertop for affordability and quick weather resistance. I primed and used exterior paint with polyurethane topcoat; the surface resists spills and cleans with a damp cloth, though I avoid placing hot cookware directly on the paint.
I left open shelving beneath the counter for propane, tools, and charcoal storage, which keeps essential items within reach. For extra protection near the grill I added a small stainless-steel sheet where heat and grease concentrate, extending the life of the pallet structure.
2) Cinder Block Built-In Grill Island with Concrete Slab Countertops

I chose cinder blocks for this built-in island because they balance strength, affordability, and ease of assembly. Stacking two to three courses of blocks creates a stable base that raises the grill to a comfortable working height without needing specialized carpentry skills.
I poured concrete slab countertops over a simple plywood form to achieve a continuous, heat-resistant surface. Reinforcing the slab with wire mesh and allowing proper cure time produced a durable top that resists cracking under routine use.
I secured the blocks to a level concrete pad to prevent settling and used masonry adhesive between courses for added stability. If I want a more finished look, I can veneer the face with stone pavers or tile; this hides the industrial block texture while keeping costs low.
I keep utility needs simple: plan for gas or charcoal clearances, ensure adequate ventilation, and run basic hookups before building the top. With careful planning and basic tools, this method yields a long-lasting, low-cost outdoor kitchen focal point.
3) IKEA BEKVÄM Prep Cart Converted to Mobile Grill Station
I repurposed an IKEA BEKVÄM kitchen cart into a compact, mobile grill station that fits small patios and balconies. The cart’s solid birch frame and two-wheel design provide a stable base and easy mobility when I reposition the grill.
I reinforced the shelves with small L-brackets to handle the weight of a tabletop grill and utensils. I added a heatproof mat on the top surface and drilled ventilation holes at the back for airflow.
I installed hooks on the sides to hang tongs, brushes, and a small towel for quick access. A removable cutting board on the lower shelf gives me prep space without permanently altering the cart.
I kept the modifications minimal so the cart remains useful indoors if needed. This approach keeps costs low while delivering a versatile, portable station that suits compact outdoor cooking.
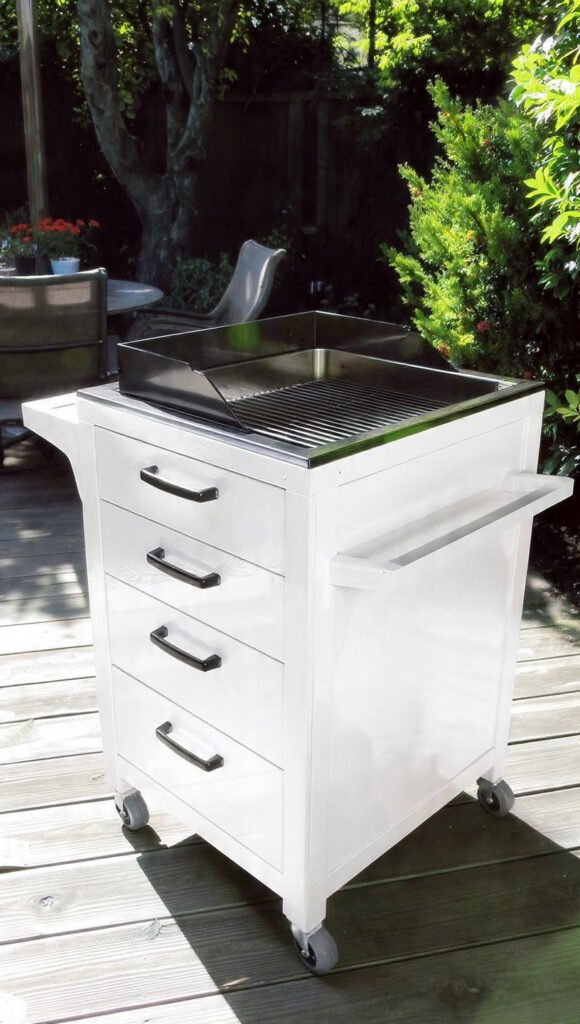
4) Repurposed Outdoor Cabinet Base with Stainless Steel Sheet Top
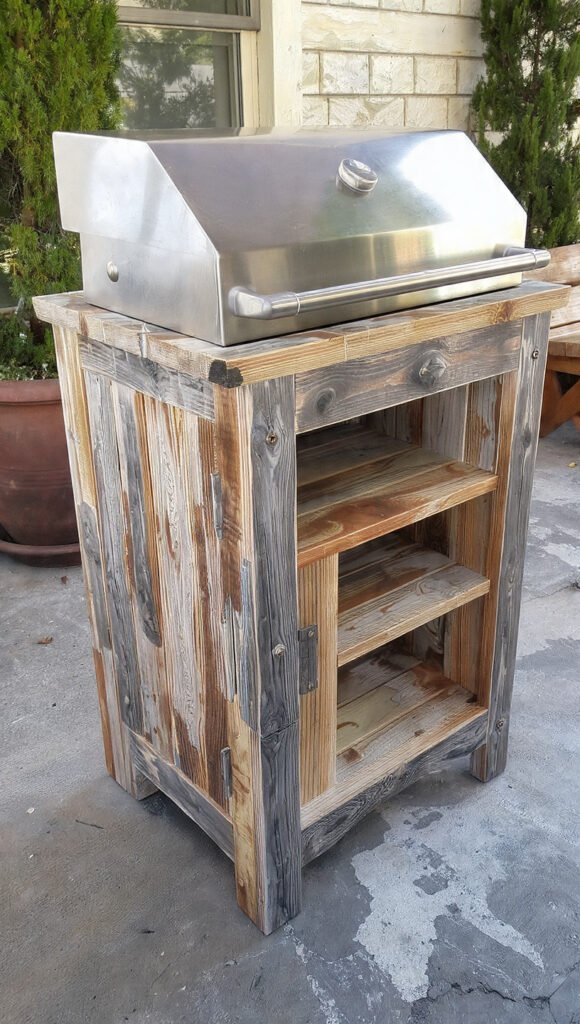
I salvaged an old indoor cabinet and converted it into a sturdy outdoor base to save cost and reduce waste. Reinforcing the frame with exterior-grade screws and adding a coat of waterproof paint gave the cabinet basic weather resistance.
I fitted a stainless steel sheet to the top for a durable, sanitary work surface that resists heat and is easy to wipe clean. I used adhesive and counter-sink screws at the edges, then sealed the seams with a marine-grade silicone to prevent water intrusion.
I added ventilation by cutting small openings at the rear bottom and installing simple vents to avoid trapped moisture. For mobility, I mounted locking caster wheels so I can reposition the station for shade or storage.
I recommend using 18–22 gauge stainless for balance of durability and cost, and treating exposed wood edges with epoxy or spar urethane. These modest upgrades turned a thrifted cabinet into a practical, low-cost grill station.
5) DIY Brick Pizza Oven and Adjacent Charcoal Grill Nook
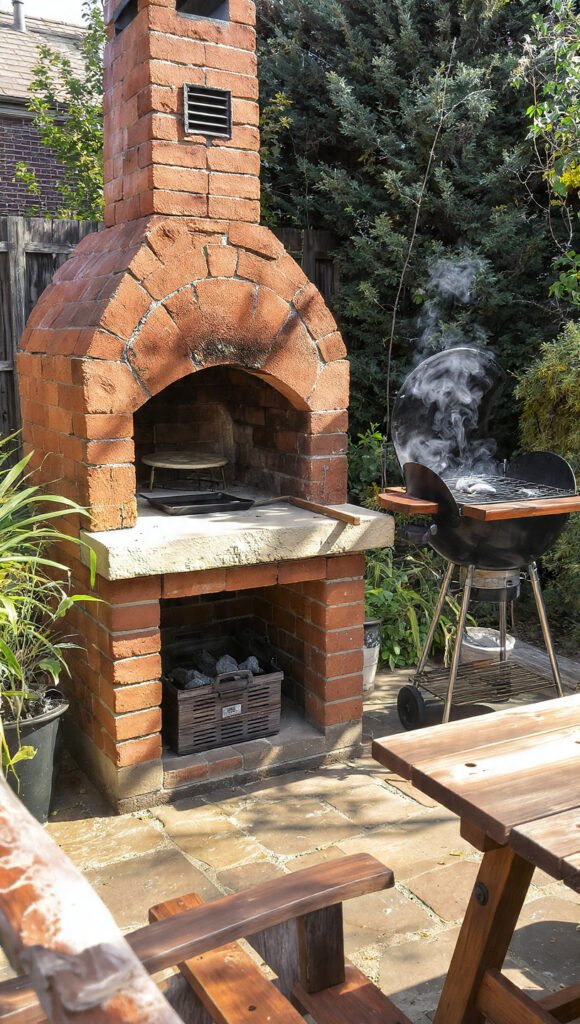
I built a compact brick pizza oven to anchor my backyard cooking area because it provides consistent high heat for pizza and bread. The oven dome sits on a small insulated base; I used reclaimed bricks and a concrete slab to keep costs down.
Next to the oven I placed a shallow charcoal grill nook framed from masonry blocks. It shares the same foundation so the layout feels cohesive, and the proximity lets me switch between wood-fired and charcoal cooking without long walks.
I designed a simple countertop between the two for prep and plating. A few concrete pavers and a weatherproof butcher block create an inexpensive, durable work surface that matches the oven’s rustic look.
I recommend venting the oven properly and leaving a safe clearance to combustible materials. Small investments in insulation and a steel grate for the charcoal nook improve efficiency and make the whole station safer to use.
6) Concrete Formwork Counter with Built-In Gas Grill Cutout
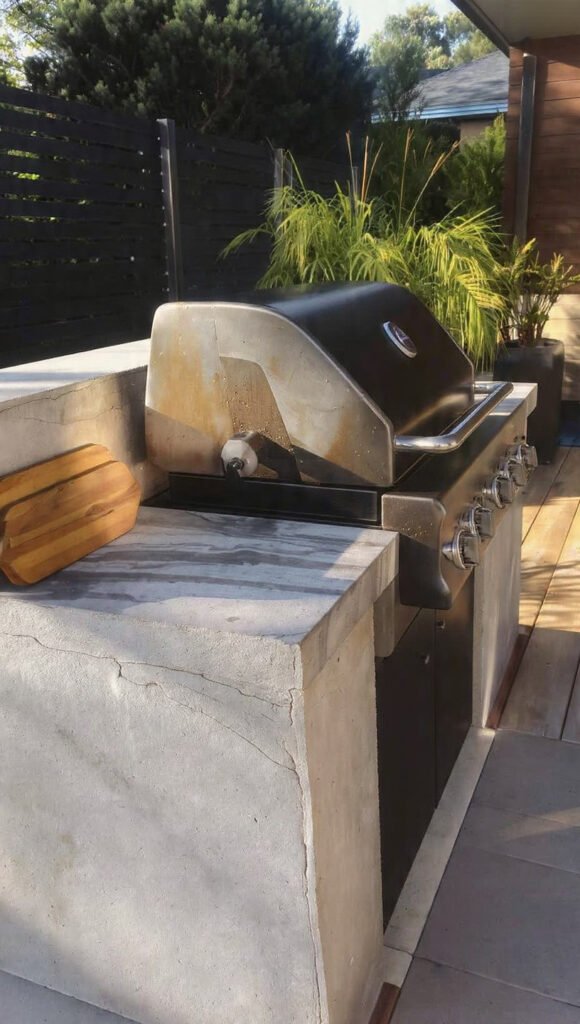
I often recommend concrete formwork for a durable, low-cost grill counter that integrates a gas grill smoothly. I build a simple frame from plywood and 2x4s, set rebar for strength, and pour a fiber-reinforced concrete mix to reduce cracking.
I design the cutout to the grill manufacturer’s specifications before pouring, so the opening aligns precisely and ventilation is adequate. I add foam or a removable insert where the grill sits to preserve the exact shape during curing.
I finish the surface with a light trowel and optional acrylic sealer to resist stains and weather. I find that concrete accepts stains or pigments well, allowing a tailored look without expensive stone.
I always allow at least 7 days of cure time before installing the grill and 28 days for full strength if the counter bears heavy loads. I follow local codes for gas connections and recommend professional hookup for safety.
7) Blackstone Griddle Cart Integration with Custom Shelving
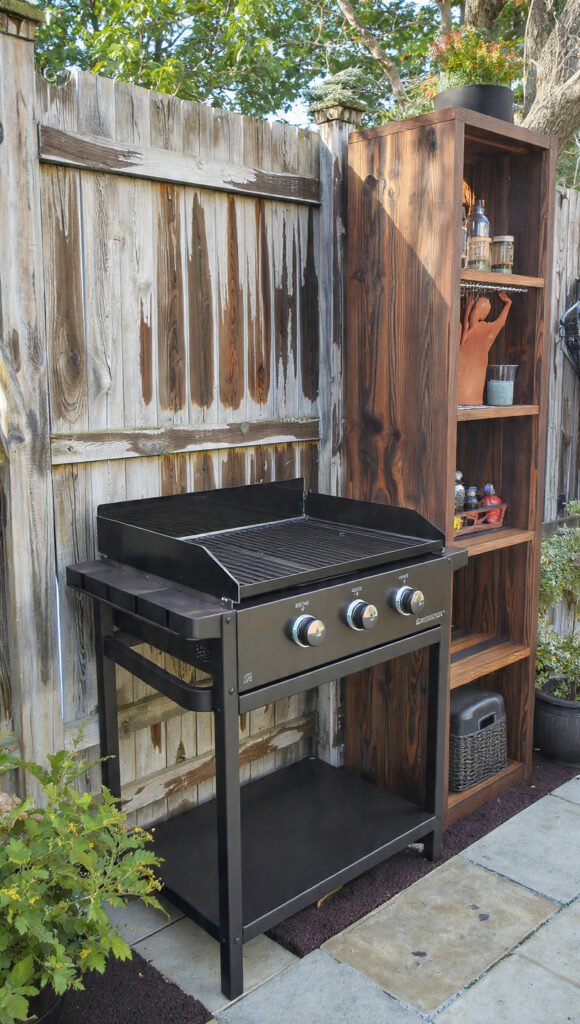
I built a Blackstone griddle cart by starting with a sturdy frame and mounting the griddle at a comfortable working height. I made sure the structure supports the weight and allows access to gas connections and controls.
I added custom shelving on both sides for prep space and storage. Open shelves hold pans and spices, while a lower enclosed shelf stores propane and bulky items safely.
I used treated plywood and weather-resistant stain to protect the surfaces from heat and moisture. Casters make the cart mobile, letting me position it for wind direction and serving.
I prioritized ventilation and clearance around the griddle to prevent heat buildup. Simple anchors and metal brackets gave me reliable support without complex joinery.
Essential Tools and Materials
I focus on materials that balance cost, durability, and outdoor performance. I also list the specific tools you’ll need to assemble a safe, functional grill station without buying a full workshop of gear.
Budget-Friendly Material Selection
I prioritize materials that withstand heat and weather while keeping costs low. For a countertop, I often choose sealed concrete pavers or treated plywood topped with a thin cement board; both resist heat and are inexpensive. For structure, pressure-treated lumber or reclaimed pallet wood works well for frames and shelving—use exterior-grade screws and wood sealer to prevent rot.
For cladding and surfaces, I recommend galvanized steel panels, cement board, or exterior-grade tile over a stable substrate. Cinder blocks or concrete masonry units make a cheap, noncombustible base and require no special skills to stack and anchor. Use high-temperature silicone and stainless-steel fasteners where the grill sits. I always budget for weatherproof paint or stain and a roll of waterproof flashing tape for seams.
DIY Tool Checklist
I keep the tool list short to save money while covering essential tasks. Required hand tools: tape measure, carpenter’s square, chalk line, hammer, and a set of screwdrivers. Power tools I use: circular saw (or handsaw), drill/driver with a set of bits, and an orbital sander for smoothing edges.
For masonry or concrete work, I include a masonry trowel, masonry bit for the drill, and a small angle grinder with a diamond blade if cutting pavers. Safety gear I never skip: safety glasses, work gloves, a dust mask (or respirator for cutting cement), and ear protection. I also keep a small caulking gun, exterior-grade silicone, and a tube of high-temp adhesive for final sealing and grill mounting.
Safety and Maintenance Tips
I prioritize ventilation, routine cleaning, and component checks to reduce fire risk and prolong the life of a cheap DIY grill station. The guidance below focuses on practical steps you can take immediately and during routine upkeep.
Proper Grill Station Ventilation
I place gas grills at least 10 feet from structures and under open sky whenever possible. For semi-enclosed stations or pergolas, I install a chimney or roof vent that provides a clear vertical exhaust path; a 6–8 inch diameter vent or a 12×12 inch louvered opening per side works for small shelters.
I keep combustible materials—wooden countertops, stored charcoal, towels—at least 3 feet from the grill exterior. For built-in or counter-adjacent installations I cut a 1–2 inch air gap behind the grill housing and use noncombustible backer materials (cement board or metal) to prevent heat transfer.
I test ventilation by running the grill on high for 5 minutes and checking for smoke accumulation and heat buildup inside the shelter. If smoke lingers, I increase vent area or add cross-ventilation to achieve a steady upward draft.
Regular Cleaning Recommendations
I clean grease traps and drip pans after every 3–5 uses to prevent flare-ups; empty metal pans into a sealed container once cooled, then wash with hot, soapy water. For grills used daily, I scrape grates after each cook and perform a deep clean monthly.
I inspect burners, gas lines, and hose connections every month for corrosion, blockages, or insect nests. I run a simple soapy-water leak test on connections after reattaching tanks—bubbles indicate a leak that I repair before using the grill.
I keep a short maintenance checklist near the station:
- Wipe surfaces with a degreaser weekly.
- Empty ash/charcoal after each full cool-down.
- Replace cracked hoses or rusted components immediately. This schedule reduces fire risk and keeps the station functioning safely.